So, I just had my first experience, ever,
really baking...like,
really baking: kneading out dough,
'proofing', 'knocking-back,' and all of these other terms I had to
Google. My newly built Earthen Oven in my backyard has sparked a sudden interest in learning to bake
artisan breads and other goodies. So far, we've cooked in our oven using a live fire (like with the pizza) or hot coals burning and 'sizzling' food. In order to bake
artisan breads, you cook in your Earthen Oven in a slightly different manner which allows you to bake over a long period of time. I decided to start with 3 loaves of bread and then used the (10 hours) of remaining retained heat to cook dinner which consisted of curried vegetables and rice. I then followed this up with a pot of beans to slow-cook over night, much to my surprise and amazement.....the Earthen Oven strikes again with perfectly cooked, non-mushy beans! I removed these the next morning. I'd like to share my experiences baking breads and other delicious foods in my earth oven as I experiment and eat. I'll post a few of my recipes along the way too!
Fresh Baked Hearth Bread
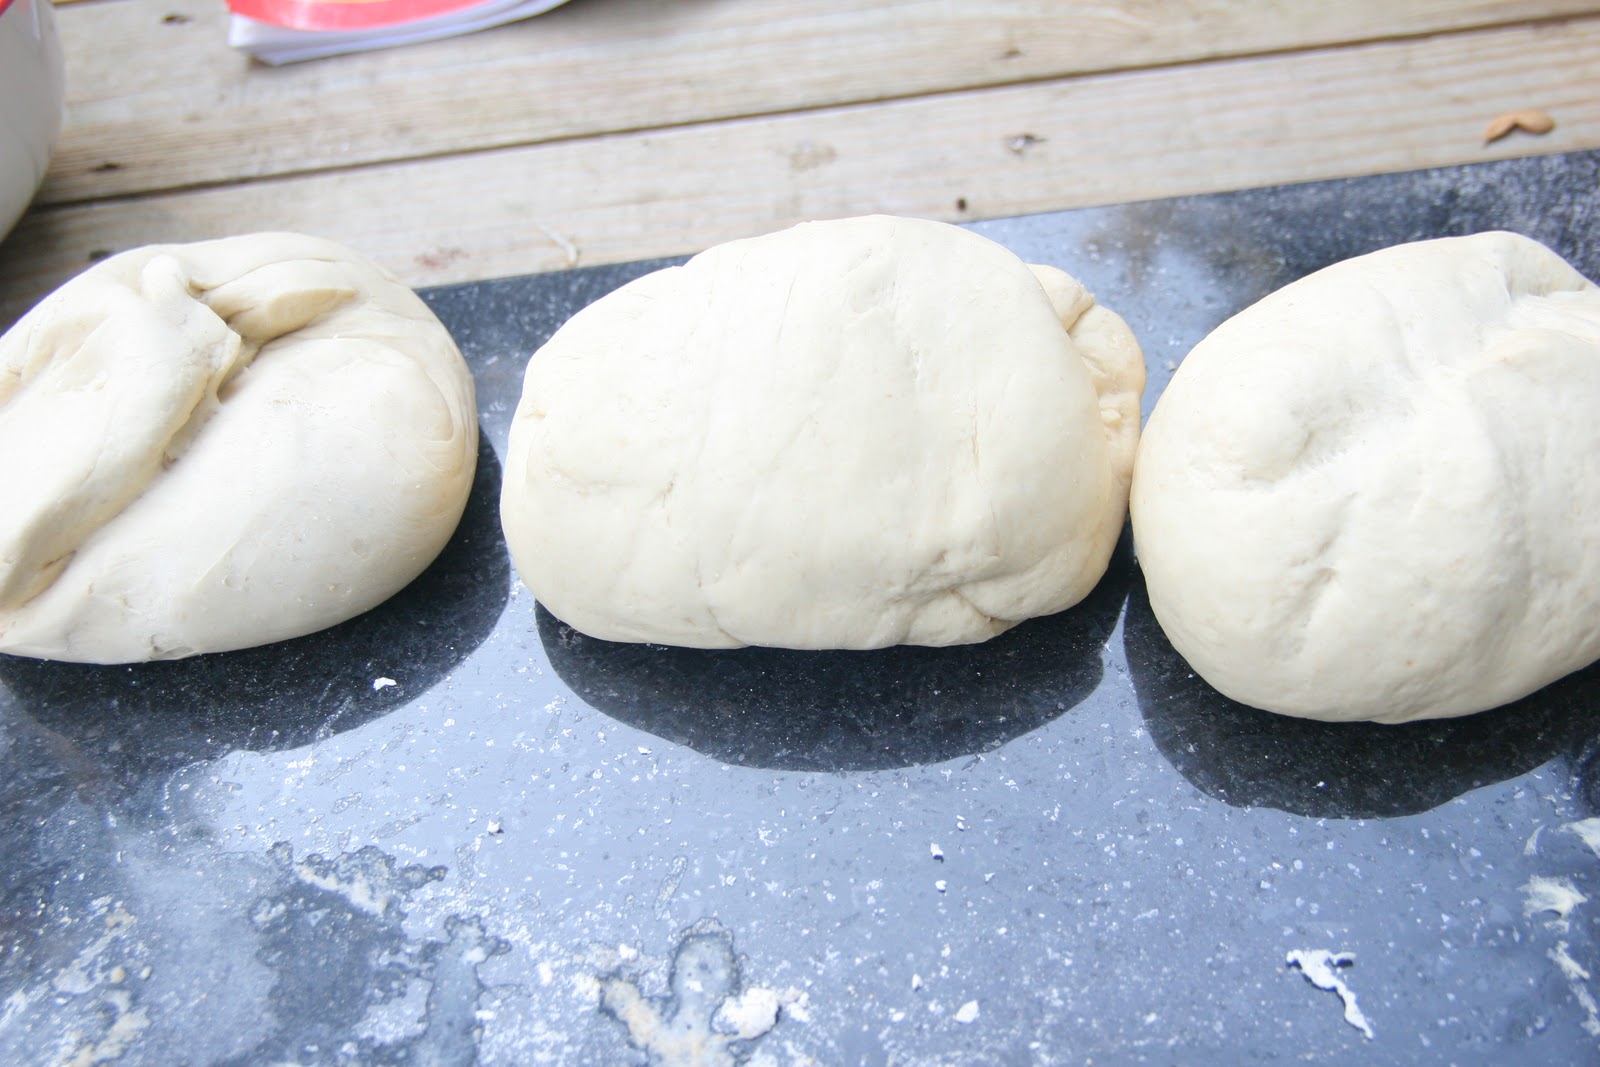
I used the recipe on the back of the bread flour bag left over from the pizza party. I tripled the recipe because I figure if you're going to light up the oven, you might as well use it to it's full capacity. Thanks to this lady on You Tube, I took my turn at kneading out the dough (she made it look a lot easier than it was). Several sloppy attempts later, I placed the 3 balls of dough in my bowls to rise, and about an hour later I 'knocked them back' and let them rise again.
 |
| dough after kneading |
 |
| letting dough rise |
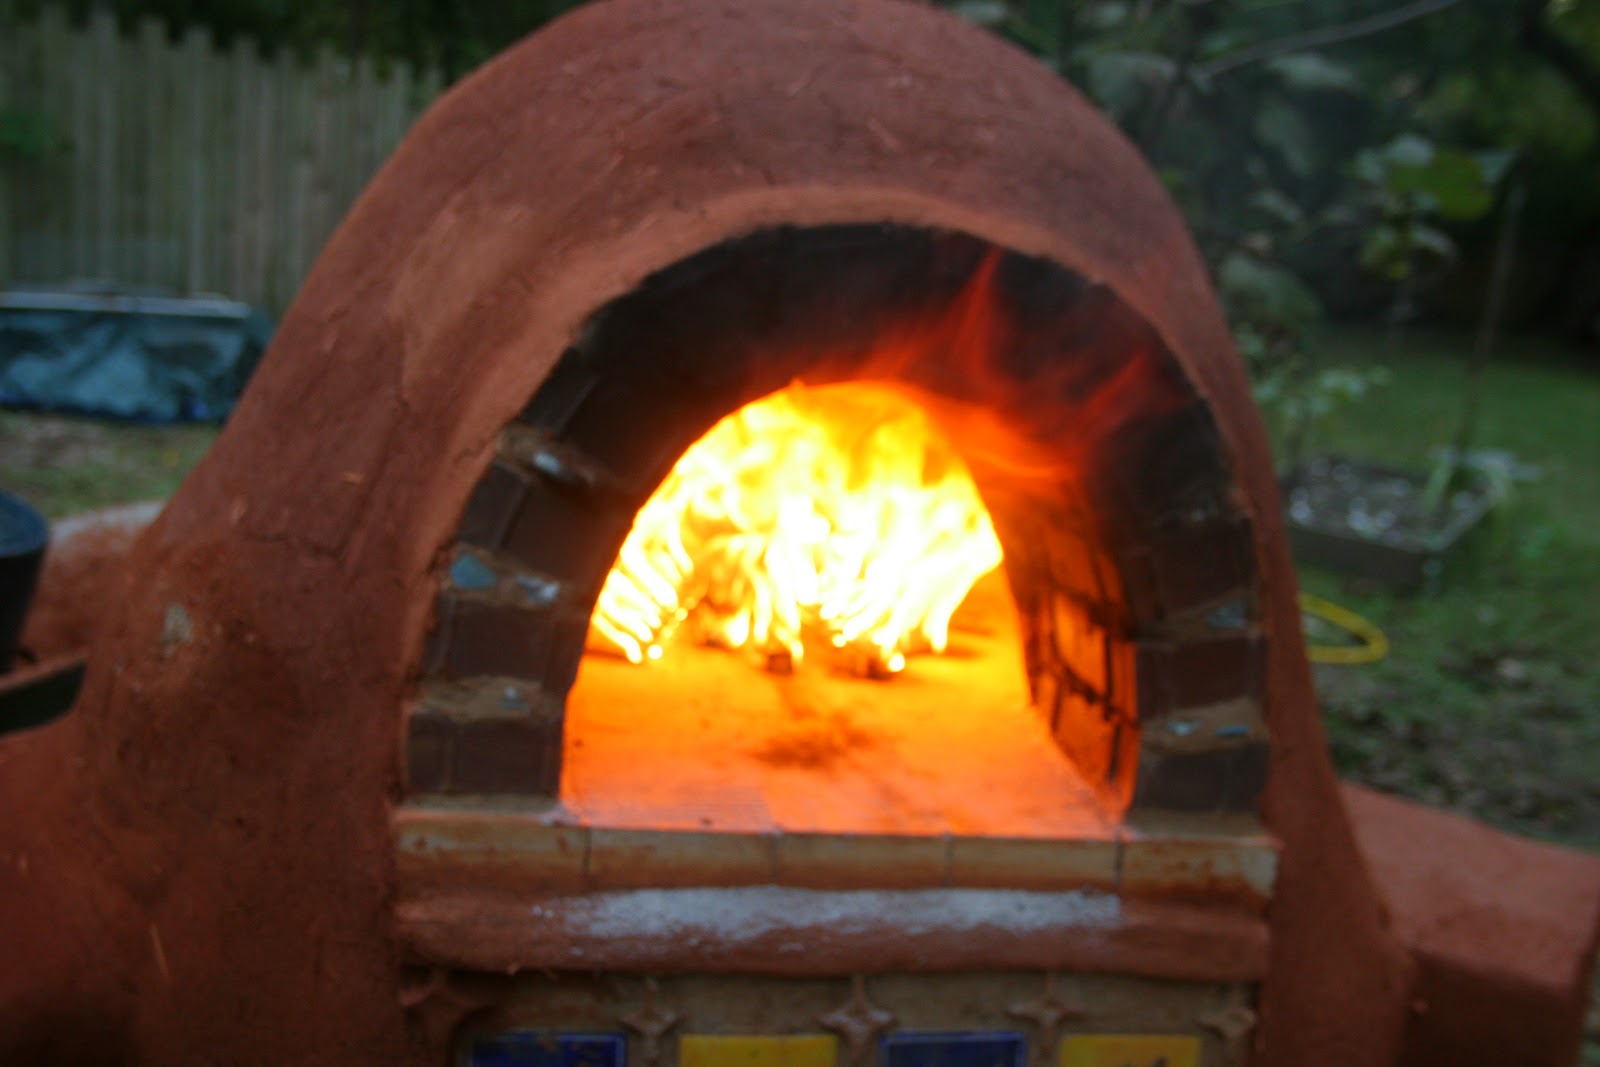
At this point I went ahead and lit the fire since I knew I'd need to let it burn for 1-2 hours before having enough retained heat to bake for a while. You're going to want to get your fire burning really HOT, to where the flames are actually shooting out of the door! Keep stoking this fire. I kept mine going until my dough was just about ready to go in, which ended up being about 1hr. 45 min. and it seemed to do the trick.
 |
| dough ready to go into oven |
 |
| heating up oven |
|
 |
| hot coals spread across hearth floor |
 |
| first peek at the bread! |
While the oven was heating up, I 'shaped' the dough into round balls and cut an 'X' into the tops. At this point the fire was SUPER hot and I was running out of wood anyways. I tried to hold my arm in the oven for an '8 Mississippi count', but I think I got to about 2 or 3 (arm hairs are still in tact). At this point, I let the fire burn down to coals, and then I spread the coals out evenly over the hearth and let it sit for about 10 min. I then used a hoe to scrape the coals out into a wheelbarrow...be careful of hot coals if you have bare feet! Once the coals were out, I wet a cotton rag and wiped the hearth down to clean the surface. I then put the oven door on to 'wash' the oven. This period of time helps the hearth floor become an even temperature all over and helps regulate the temperatures inside of the oven as a whole. I decided to test the temperature to see if it was ready for breads and I threw in a handful of wheat flour. I had read that if it browns in 10-20sec. then it's good for bread, and if it burns up fast, the oven is too hot and you should let it sit. My flour looked good so I gave it a go! After flouring the bakers peel and putting the first loaf on, I sprayed the top of the bread with water to add steam in the oven. (this might be unnecessary). I popped the first loaf in, closed the door tight, and sat back and crossed my fingers. About 20 min. later I could smell it cooking from indoors and I just couldn't take the suspense any longer. Much to my surprise, this golden brown, beautiful round loaf was staring me in the face! I quickly got it out, as it maybe looked a little too brown, and put it on racks to cool. I prepped the other 2 loaves and threw those in at the same time for the second round of bread baking. I decided on this batch to turn them 180 degrees after 10 min. It seemed that the oven was not quite as hot on this go 'round, so I rotated them and decided to leave these for another 20 min. After a total cook time of 30 min. I pulled out two lightly golden brown perfect loaves! I waited 45 min. or so before cutting into the first loaf...crispy crunchy outside, warm soft inside. Delish!
 |
| letting bread cool |
 |
| hot damn those are some golden buns! |
|
|
|
|
|
|
|
I'll go ahead and share my bread recipe with you and then tell you how I decided to use the remaining heat in the oven.
Hearth Bread Recipe
3 1/3 cups bread flour
1/4 cup whole wheat flour
1 1/2 teaspoons salt
1 1/4 teaspoon yeast
1 1/3 cups water
1 teaspoon honey
Mix flours, salt, and yeast in large bowl.
Stir in water and honey.
Knead dough for 8-10 min.
Place dough in oiled bowl, cover with plastic wrap, and let sit in warm place until dough doubles in size. Place dough on floured surface and gently flatten dough. Shape into round ball. Cover with plastic wrap and let rise until doubled in size. Place dough on baker's peel (floured) and slice 'X' into top of loaf. Once oven is ready, transfer dough into oven, close door, and wait 20-30 min, or until golden brown. Rotate 180 once half way through cooking. Spraying dough with water prior to inserting in oven may increase steam production.
Earthen Oven Veggies, Rice & Beans...Oh My!
What to do with all of this remaining heat you ask? Well just keep on cookin'!!! Practically anything you have in your fridge or cabinets you can cook in the earthen oven and this will provide you with good eats for the remainder of the week. I decided to throw together a curried vegetable dish in the cast iron pan and some rice with coconut milk. The veggies cooked up beautifully in only about 25 min with one stirring. The rice however, I think I'll need to keep experimenting with because it was still very watery after the 25 min.; I decided to finish it up on the stove top because I was starving! The oven was still so hot, but being that we haven't been to the grocery store in a while, I was having trouble finding other things to cook. I ran across a bag of dried beans, which I had heard you could slow-cook in the ovens, but didn't quite buy it. I tossed the beans in a metal pot, covered them with water, put the lid on, and then stuck it in the oven. I closed the door and decided to forget about it until the morning, completely thinking I'd wake up to either hard beans and water, or pure mush. Around 8am the next morning, I pulled the oven door off (still hot) and pulled out the most perfectly cooked beans I'd ever seen!!! Not mushy! But crispy and well-cooked! Looks like dinner for tonight!
 |
| curried vegetables |
 |
| slow-cooked beans overnight |
So all in all....in one firing of 1 hr. 45 min. and a small bucket of scrap wood, I cooked 3 loaves of delicious bread, curried vegetables, and a pot of beans!!! Not bad for my first try. I think next time I'll have even more dishes lined up to cook up! Good (and healthy) eats!!!
Unlike my baking recipes, when I cook, I measure nothing. Here's my recipe for curried vegetables:
Earthen Oven Curried Vegetables
1/2 sweet potato sliced
1 small onion sliced
4 cloves of garlic minced
3 tablespoons of ghee (indian clarified butter)
1 bunch of kale chopped
2 dried red peppers chopped
1 tablespoon of red curry paste
a pinch of sea salt
a few large shakes of curry powder
a dollop of honey
Combine all ingredients in a cast-iron pan except for the kale. Mix.
Place in oven and close door.
Stir after approximately 15 min.
Add kale. Cook for another 10 min. or until veggies look tender and done.
Serve over coconut milk rice.
59P6UJ4WZGQ7


No comments:
Post a Comment